Paragard Dosage
Generic name: COPPER 313.4mg
Dosage form: intrauterine device
Drug class: Miscellaneous vaginal agents
Medically reviewed by Drugs.com. Last updated on Jul 8, 2024.
Important Dosage and Administration Instructions
- Paragard should only be inserted by a healthcare provider trained in Paragard's insertion procedures, because insertion for Paragard is different from that used for other intrauterine systems. Healthcare providers should become thoroughly familiar with the product, product educational materials, product insertion instructions, and prescribing information before attempting insertion of Paragard.
- Insert one Paragard at the fundus of the uterine cavity.
- Remove Paragard on or before 10 years from the date of insertion.
- May replace Paragard at the time of removal with a new Paragard if continued contraceptive protection is desired.
- Before considering use of Paragard, make sure that the female is an appropriate candidate for Paragard. Exclude pregnancy (consider the possibility of ovulation and conception) prior to use.
Timing of Insertion
Refer to Table 1 for recommended timing of Paragard insertion.
|
Note: The inserter provided with Paragard (see Figure 1) and the Insertion Procedure described in subsection 2.4 are not applicable for immediate insertion after childbirth. For immediate insertion post childbirth, remove the inserter and Paragard from the tray, move the button forward and then completely back to release the Paragard unit from the inserter and insert Paragard. |
|
| Clinical Situation | Recommended Timing of Paragard Insertion |
| 1. Start Paragard in females not currently using contraception | At any time during the menstrual cycle. |
| 2. Switch to Paragard from an oral, transdermal, or vaginal form of hormonal contraception or an injectable progestin contraceptive | At any time during the menstrual cycle; discontinue the previous method. |
| 3. Switch to Paragard from a contraceptive implant or other intrauterine system | Same day the implant or IUS is removed (insert at any time during the menstrual cycle). |
4. Insert Paragard after abortion or miscarriage |
Immediately after abortion, although immediate placement has a slightly higher risk of expulsion than placement at other times. Insertion after second trimester abortion is associated with a higher risk of expulsion than insertion after a first trimester abortion. |
5. Insert Paragard after Childbirth |
May insert immediately postpartum. Insertion before uterine involution is complete, which may not occur until the second postpartum month, has been associated with increased risk of expulsion. There appears to be an increased risk of perforation in lactating women. |
Preparation Instructions
Read the Preparation Instructions and Insertion Procedure before initiating Paragard insertion.
Before insertion:
- Do NOT remove the inserter from the tray before the arms are loaded into the insertion tube. The tray will be used to fold the Paragard arms down and load the IUS into the inserter.
- Use strict aseptic techniques throughout preparation.
- Prepare placement tools (e.g., speculum, cotton swab, tenaculum, uterine sound, scissors, and forceps).
- Consider use of an analgesic.
- Establish the size and position of the uterus by performing a bi-manual examination.
- Insert a speculum and, using a cotton swab, cleanse the cervix and vagina with an antiseptic solution.
- Apply a tenaculum to the cervix and use gentle traction to align the cervical canal with the uterine cavity.
- Gently insert a sterile uterine sound to measure the depth of the uterine cavity. The uterus should sound to a depth of 6 to 9 cm except when inserting Paragard immediately postabortion or immediately postpartum.
- Insertion of Paragard may be associated with pain and/or bleeding, vasovagal reactions (e.g. syncope, bradycardia), or seizure, especially in patients with a predisposition to these conditions.
- Insertion into a uterine cavity measuring less than 6 cm may increase the incidence of expulsion, bleeding, pain, and perforation.
- If cervical stenosis is encountered, avoid undue force. Dilators and analgesia/local anesthesia may be helpful in this situation.
Insertion Procedure
Follow the insertion instructions exactly as described to ensure proper placement and avoid early release of Paragard from the inserter.
- Use strict aseptic techniques throughout the insertion procedure.
Step 1: Opening the Sterile Paragard Package
-
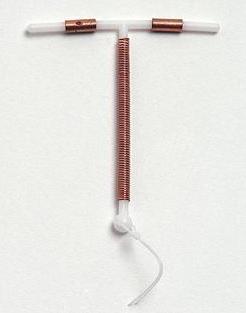
Place the package containing Paragard (face-up) on a flat sterile field (see Figure 1). Open the pouch from the handle end where the arrow on the Placement Guide says “OPEN”.
- Remove the clear cover from the tray (not shown).
- Confirm that the top of the button is located at the starting line on the handle prior to loading Paragard.
- The inserter should remain in the tray until Paragard T-Arms are loaded.


Do not slide the button on the handle before folding the arms in the tray.
Do not repeatedly slide the button forward and back as this may cause slack in the threads and may result in an unsuccessful placement.
Step 2: Loading Paragard into the Inserter
-
Using sterile gloves, place one hand on the distal end of the tray and the other on the inserter handle. Slide the handle completely forward so that the Paragard advances into the Loading Tip folding the T-Arms of Paragard against the stem (see Figure 3).
Figure 3: Folding Tips of T-Arms of Paragard using Loading Tip
- Once the T-Arms are folded against the stem, slide the button on the handle completely forward to advance the insertion tube over the tips of the T-Arms (see Figure 4). Only the tips of the T-Arms should be in the insertion tube. Do not advance beyond the copper collars.

IMPORTANT: Do not leave the T-Arms of Paragard bent for more than 5 minutes, as the arms may not open properly.
Figure 4: Inserting Tips of T-Arms into Insertion Tube

Step 3: Adjusting the Flange
- Once the above steps are completed and Paragard is in the insertion tube, adjust the blue flange. The tray is marked with centimeters and can be used to set the flange to the correct depth (see Figure 5).
-
Adjust the flange so the distance from the top of Paragard (where it protrudes from the inserter) to the top of the flange is equal to the pre-measured uterine depth.

Step 4: Removing Inserter from Tray
- Ensure the button remains in the forward position.
- To remove the inserter from the tray, gently lift the handle out of the tray, then gently slide the inserter back and lift out of the tray. (see Figure 6).
- Upon removal from the tray, verify and rotate the blue flange as needed so that the horizontal arms of Paragard and the long axis of the blue flange and handle lie in the same horizontal plane to ensure the arms open in the proper direction.
-
Confirm that both T-Arms are captured within the insertion tube.

Step 5: Inserting Paragard to the Fundus
- To orient the uterus in an axial position, apply gentle traction to the tenaculum. While holding the button forward, pass the loaded inserter through the cervical canal until the Paragard reaches the fundus of the uterus. This will ensure placement of Paragard at the highest possible position within the uterus.
-
The blue flange should be at the cervix in the horizontal plane. The button should remain in the forward position (see Figure 7).

Step 6: Releasing Paragard and Withdrawing Inserter
- Release the arms of Paragard by holding the handle steady and sliding the button all the way down (and you may feel a click). Do not stop at the starting line as it is not used for deployment.
-
This releases the threads and the T-Arms of Paragard high in the uterine fundus (see Figure 8).
- Gently and slowly withdraw the inserter from the uterus and cervical canal.
- Only the threads should be visibly protruding from the cervix (see Figure 9). Trim the threads so that 3 to 4 cm protrude into the vagina.
- Measure and note the length of threads, date of placement and Paragard lot number.
- Discard the used inserter – do not attempt to re-use the inserter because it is a single use device.
-
If you suspect that Paragard is not in the correct position, check placement (with ultrasound, if necessary). If Paragard is not positioned completely within the uterus, remove it and replace it with a new Paragard. Do not reinsert an expelled or partially expelled Paragard.
Figure 9: Appropriate Paragard Placement in Uterus


Postplacement Management of Paragard
Following placement:
- Examine the female after her first menses to confirm that Paragard is still in place. You should be able to visualize or feel only the threads. The length of the visible threads may change with time. However, no action is needed unless you suspect partial expulsion, perforation, pregnancy, or breakage.
- If you cannot find the threads in the vagina, check that Paragard is still in the uterus. The threads can retract into the uterus or break, or Paragard can break, perforate the uterus, or be expelled. Gentle probing of the cavity, x-ray, or sonography may be required to locate Paragard.
- Remove Paragard if it has been partially expelled or perforated the uterus.
Do not reinsert a used Paragard.
Removal of Paragard
Timing of Removal
- Paragard can be removed at any time prior to 10 years after insertion.
- Remove Paragard no later than 10 years after insertion. A new Paragard can be inserted at the time of removal if continued contraceptive protection is desired.
Removal Instructions
- Use a speculum and visualize the cervix.
- Remove Paragard with forceps, pulling gently on the exposed threads. The arms of Paragard will fold upwards as it is withdrawn from the uterus.
- If removal cannot be accomplished by gentle pulling, consider checking Paragard location and assess for embedment and perforation (with imaging, if necessary).
- Breakage or embedment of Paragard in the myometrium can make removal difficult. IUS breakage may be associated with removal. Analgesia, paracervical anesthesia, cervical dilation, alligator forceps or other grasping instrument, or hysteroscopy may assist in removing an embedded Paragard.
- Make sure Paragard is intact upon removal.
- Removal may be associated with some pain and/or bleeding, vasovagal reactions (e.g. syncope, bradycardia), or seizure, especially in patients with a predisposition to these conditions.
More about ParaGard (copper topical)
- Compare alternatives
- Pricing & coupons
- Reviews (1,307)
- Drug images
- Side effects
- During pregnancy
- Drug class: miscellaneous vaginal agents
Patient resources
Other brands
Professional resources
Related treatment guides
See also:
Further information
Always consult your healthcare provider to ensure the information displayed on this page applies to your personal circumstances.